
A Comprehensive Guide to Bending EMT Conduit
Bending Electrical Metallic Tubing (EMT) conduit is a critical skill for electrical installations, ensuring that conduit runs align neatly and securely around obstacles while maintaining the integrity of the electrical system. This guide covers essential tools, steps, tips, and common pitfalls for successful conduit bending.
Step 1: Preparation – Choose the Right Tool
Before you begin bending EMT conduit, it’s essential to select the correct bender for the job. EMT conduit comes in various sizes—typically ½”, ¾”, and 1”—and each size requires a bender specifically designed for that diameter.
Important: Do not attempt to use a ½” bender for ¾” conduit or vice versa, as the mismatch can lead to improper bends and damage to both the conduit and the bender. Also, Rigid Conduit Bender is different than EMT conduit Bender, so it is also important to find the right one to bend your pipe.
Step 2: Measure, Cut, and Mark
Measure and Cut: Determine the required length of conduit for your installation and cut it to size using a conduit cutter or hacksaw.
Identify Bend Types: Decide which bends are needed—90-degree, offsets, saddles—and measure the necessary distances from reference points like box edges or walls.
Mark the Conduit: Clearly mark the conduit at the points where bends will begin.
Step 3: The Bending Process
Insert the Conduit: Slide the conduit into the bender, aligning the marked point with the appropriate indicator on the bender (usually an arrow or star).
Set the Bender on the Ground: Place the bender firmly on a flat, stable surface.
Apply Steady Pressure:
Step on the bender’s footrest for stability.
Using both hands, apply slow, steady pressure on the handle to bend the conduit to the desired angle (e.g., 45° or 90°).
Refer to the degree markings on the bender head to check the angle during bending.
Account for Springback: After releasing pressure, the conduit will "spring back" slightly, typically 3-5 degrees. Compensate by bending a little beyond your target angle.
Step 4: Tips for Successful Bending
Practice: Gain confidence by practicing on scrap pieces of EMT before working on critical runs.
Use Safety Gear: Wear safety glasses and gloves to protect from sharp edges and debris.
Flat Surface: Always bend on a flat, level surface to ensure consistency and accuracy.
Apply Gradual Pressure: Avoid sudden movements or jerks, which can kink or deform the conduit.
Learn Bend Calculations: Memorize formulas for offsets, saddles, and shrinkage to improve precision.
Step 5: Common Bending Mistakes and How to Avoid Them
Insufficient Strength:
Bending EMT requires steady force. If you’re not strong enough or apply inconsistent pressure, the conduit may flatten or kink. Use proper technique and body weight for leverage.
Unstable Surface:
Bending on uneven or unstable ground can cause misalignment and improper bends. Always work on a stable, flat surface.
Conduit Quality:
The quality of the conduit itself plays a significant role in successful bending. Factors such as wall thickness, zinc coating, and material composition can impact bendability. Poor-quality conduit may kink, crack, or deform during bending.
Question:
How do you know if your conduit is of good quality? How can you tell the difference?
Answer:
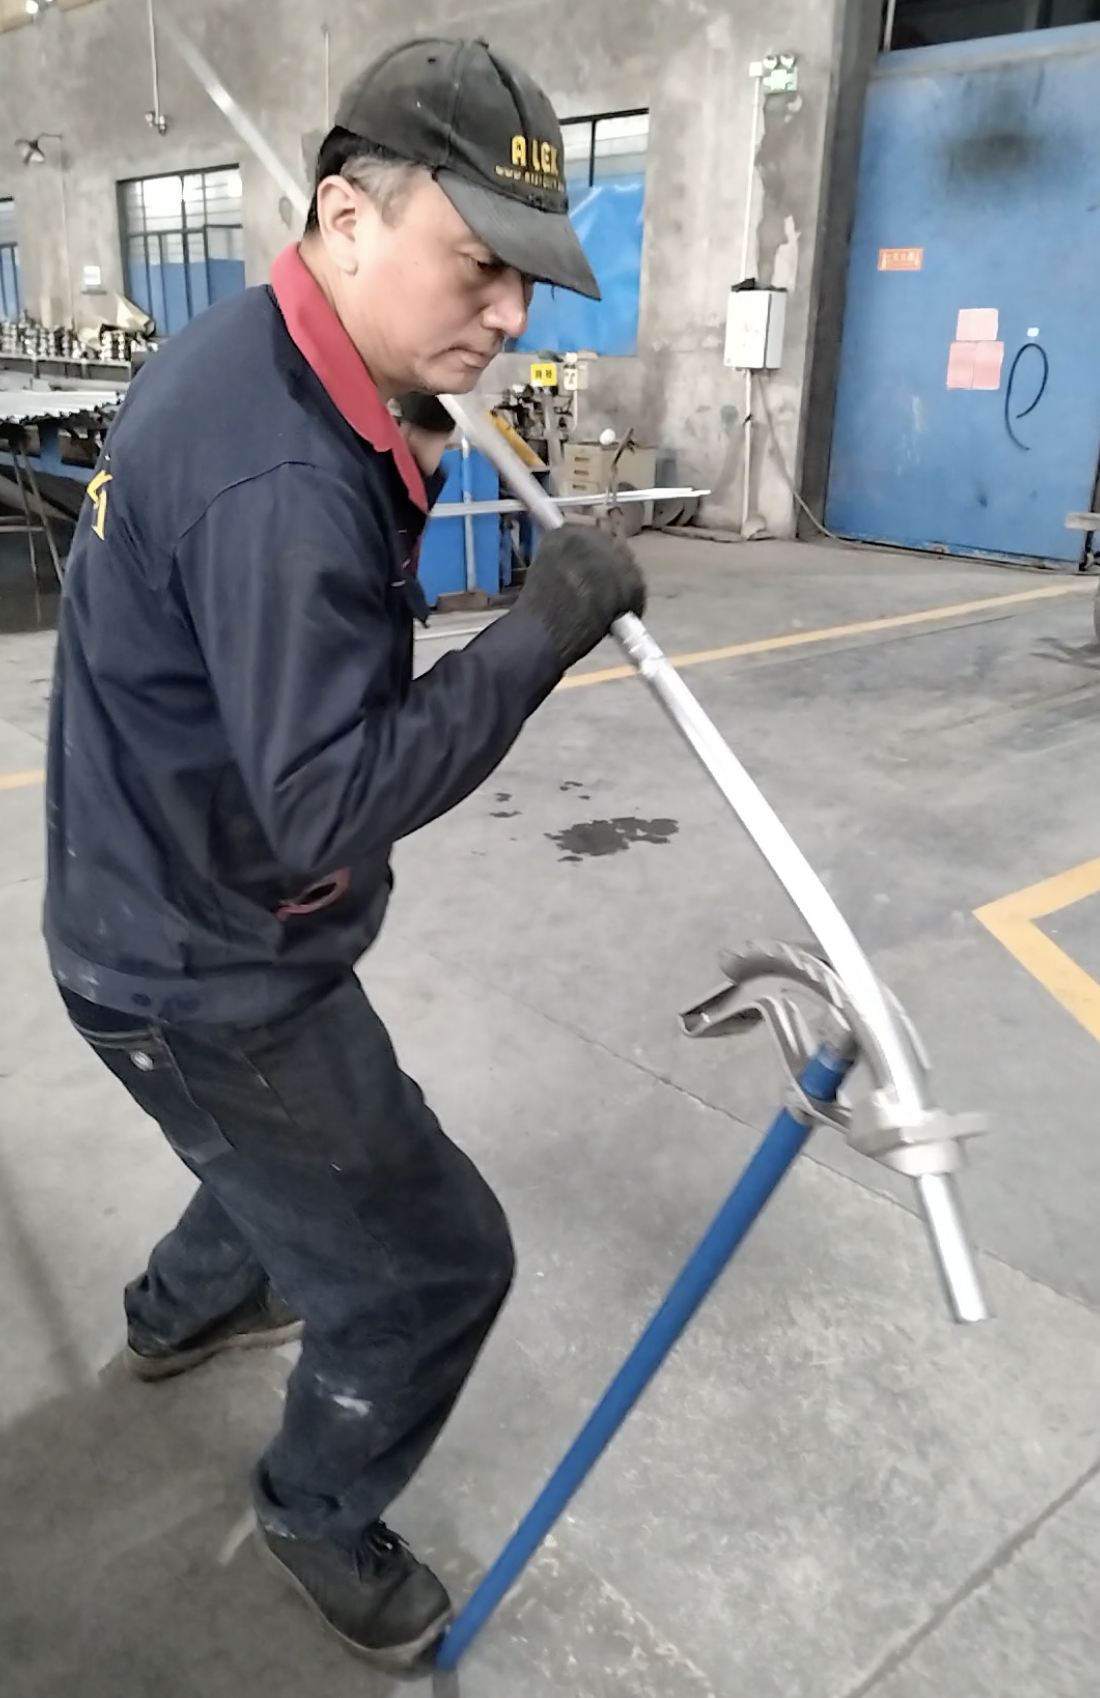
It’s actually quite simple. Below is a picture of our colleague bending an EMT conduit at the ALEX factory. As you can see, a high-quality EMT conduit not only allows bending from the bottom but even from the top. ALEX EMT conduit lets you bend it both ways, just like our colleague demonstrates.
This is possible because we use high-quality, flexible raw materials, made possible by the exceptional work of our R&D team. Thanks to this, our conduits are not only strong but also soft enough to bend easily. Bending from the top, in particular, doesn’t require much strength—making it a great indicator of superior quality.
Step 6: Troubleshooting Tips
Kinking: If kinking occurs, ease up on pressure and check alignment. Start again using a smoother, more controlled motion.
Incorrect Angle: Double-check conduit alignment with the bender’s markings and ensure you’re applying pressure evenly.
Overbending: If you exceed the desired angle, carefully straighten the conduit and rebend. Practice compensating for springback.
Final Note
Bending EMT conduit is a blend of skill, precision, and practice. Mastery of this technique ensures your electrical installations are not only functional but also aesthetically pleasing and code-compliant. Take the time to understand the tools, practice the steps, and avoid common mistakes, and you’ll soon be bending conduit like a pro.
June 3rd, 2025 by James